To manage website, I use SFTP/SSH over FTP. When use SFTP/SSH, I choose key-based authentication over username & password. Key based login is considered much more secure than password based login. The good news is, most Linux based hosting packages allow user to active SSH access. Comparing with setting up a FTP connection in your favorite FTP client, setting up a SFTP connection with private SSH key does require few extra steps. But once it is done, you can enjoy more secure connection with less security concern.
As my favorite code editor, Coda 2 takes up desktop screen most of the time. It is text editor, FTP client, terminal & MySQL client all-in-one. But its documentation isn’t helpful in terms of SFTP/SSH setup. I had some confusing experience with Coda that the SFTP connection not working. Failed attempts taught me how to setup SFTP with Private SSH key in Coda the right way. In this post, I will use a brand new configuration as an example, to show you how to add a new SFTP connection in Coda 2.
Get the Private SSH Key
- Login to your website CPanel, and locate the SSH/Shell Access icon (in security section).

- Make sure you have enabled SSH Access in Manage SSH Access. (1st time setup may requires an account verification over the phone with hosting provider)
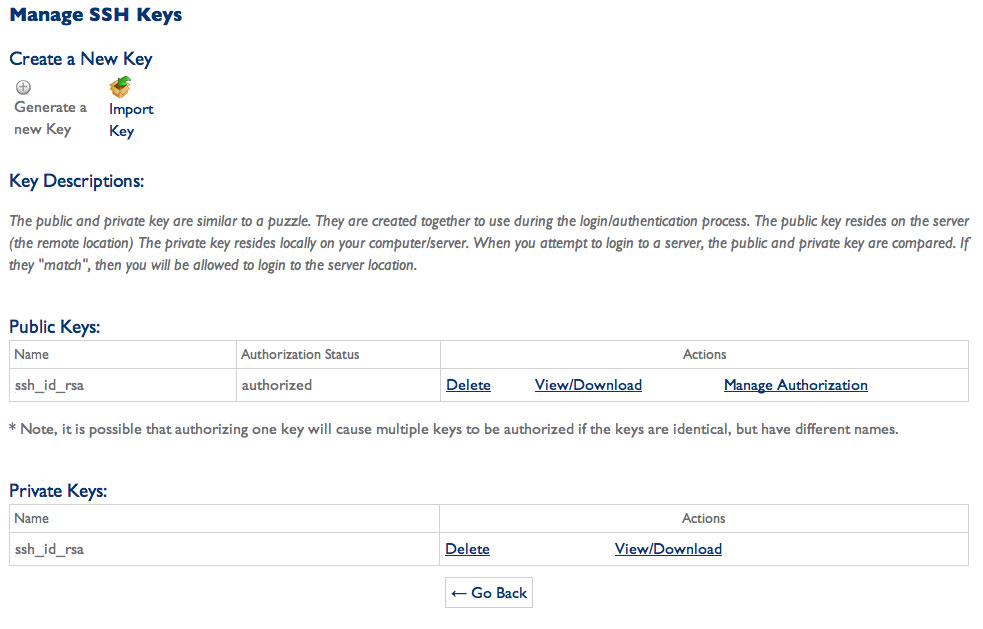
- Click Manage SSH Keys
- For the 1st time setup, you have a blank table without public key and private key. Click on Generate a new key.
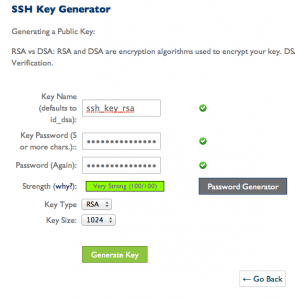
- In SSH Key Generator, key in (and remember) the Key Password, you’ll need for Code setup. Select RSA over DSA, choose 2048 for Key Size if you prefer enhanced security. Click Generate Key to create the public SSH Key.

- Go back to Manage SSH Keys page, in Public Keys section, click on Manage Authorization to authorize the key for use to connect to this account.
- In Private Keys section, click View/Download to download the private key to your local computer.

Setup a Site with SFTP Connection in Coda
- Before rushing into Coda, we need to add the SSH key to keychain. To do so, I use ssh-add command in Terminal. (You shall chmod the key file to 600, otherwise, you may have trouble later on)
The command isssh-add -K /path-to-file/ssh_key_filename
You will be asked for passphrase created during the step 5 in previous process “Get the Private SSH Key”

- If Code is already launched, shutdown and restart.
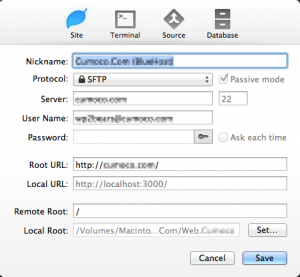
- Add a new site in Coda, in Site setting, select SFTP as protocol, enter your username, but leave the password empty.

- Click on the Key icon beside Password box, and manually select the private key file we saved in previous step 7.
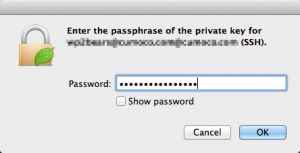
- (If you’ve done it properly, Coda should prompt for passphrase). Enter the passphrase for the private key.

- Click OK, and then Save setting.
Try to connect, you should see the remote file directory as normal. Happy Coda!!
(If you still can’t connect by any chance, try to complete quit Coda and restart it).